How to Break In Your Baseball Glove
Congratulations! You’ve just bought a brand new baseball glove, which is a great investment in your baseball career. Now, it’s your duty to take care of this investment. Baseball gloves (especially the high-quality ones) arrive so stiff that they’re impossible to close, which means you can’t use yours in a game until you break it in. There are many different ways you could do so, but some are much safer and more sensible than others. Which is why I’ll be going through the most common glove break in techniques, explaining some of the do’s—and dont’s—that will make your new investment pay off tenfold.
Steaming the Glove
Using steam to break in your glove is simple and speedy. In fact, it’s probably the fastest technique if you need to use your glove in the next day or two.
It’s also important to note that steaming isn’t the healthiest option for your new glove. The steaming process loosens up the glove’s fibers, which will negatively affect its long-term durability. So if you want your investment to last years, then maybe avoid the steam technique.
But if you’re set on steaming, you might want to leave it to the experts. Some sporting goods sports (such as Dick’s) have their own steam machines, and will be happy to help you out. Yet, if you’re on a time crunch or are set on steaming yourself, here’s what you’ll need to do:
-
Apply glove conditioner or softener to your glove prior to steaming. This will make the steaming process faster and more effective.
-
Place your glove inside a steamer pot or crock pot (not immersed in water), close the lid, and let your glove sit inside the steamer pot from anywhere between 30 seconds to 2 minutes, depending on your pot’s hotness.
-
Upon removing the glove, bend and stretch it a bit with your hands, take a mallet or some sort of smacking apparatus, and whack the glove’s pocket and other stiff parts until they loosen up.
-
Repeat this process until you’re satisfied with the glove’s looseness.
As I said, steaming your glove could potentially harm it, so either proceed with caution or let the professionals handle it. Luckily, there are other great options to break in your new leather.
Warm Water/the Aso Method
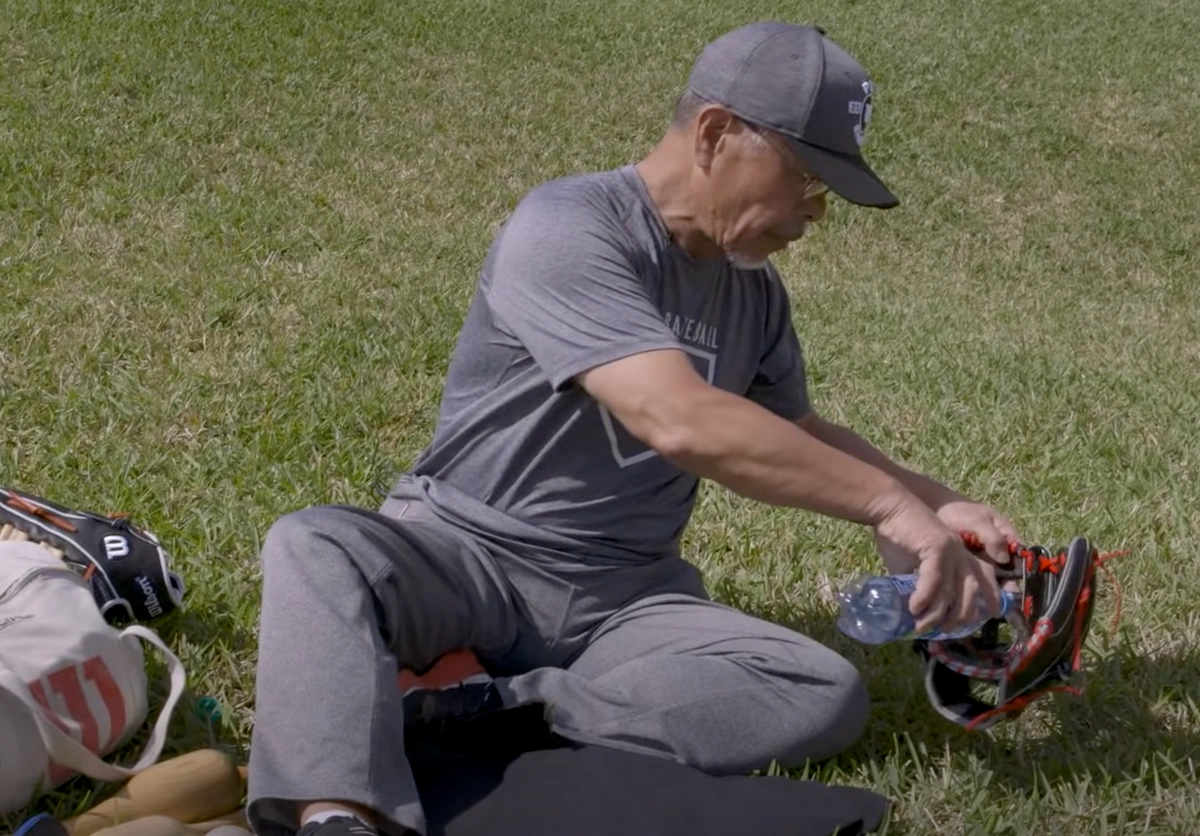
The Aso Method is named after Shigeaki Aso, one of the world’s finest glove crafters and a legend in the baseball community. Here’s how to replicate his infamous break in technique:
-
Fill a cup with warm water and pour it over your glove, while remaining careful to not drench it.
-
Once the glove is damp, begin to knead, squeeze, and stretch the glove’s leather with your hands, focusing on its stiffest areas.
-
After that, smack your glove with a mallet for a few minutes, focusing on the heel pad, web, and finger slots, while also hitting the glove’s pocket to deepen it.
-
Repeat the process until you’re satisfied with the glove’s looseness.
Admittedly, I (and some others) have reservations about The Aso Method—only because I personally wouldn’t want to pour water on my glove. But Aso is a master of his craft, and surely knows more about glove crafting than me, so don’t let my reservations stop you.
The Aso Method, as seen on YouTube
Glove Wrapping
Another potential technique you can use to break in your glove is called glove wrapping. This method is simple:
-
Put a baseball or softball in your glove’s pocket. Softballs work well because they’re bigger than a baseball, which means they can create a deeper pocket.
-
Close the glove, touching the glove’s pinky and thumb finger slots together.
-
Wrap the glove with rubber bands, plastic wrap, or anything else that will keep it closed.
-
Let your glove sit for a couple of days this way, unwrap it, and repeat until you’re satisfied with the glove’s looseness.
I utilized this technique for all of my new gloves. It does take some time, though, but if your season doesn’t start in the near future, then glove wrapping is a great option.
Glove Oils
Glove oils and conditioners can (and should) be used before, during, and after breaking in your glove—but make sure to use the good stuff. Your best bet is going to your local sporting goods store or online shopping outlet to get a glove conditioner that’s produced for this specific purpose.
When applying glove oil/conditioner to your new leather, a little bit goes a long way. Using too much can be unhealthy for the glove (and will certainly weigh it down), so be sparing. Don’t apply the oil/conditioner directly on your glove, either, because that makes it easy to overdo it. Rather, put it on your finger or a towel first, then apply it onto every single inch of your glove, both on its outside and inside. Next, rub the glove oil/conditioner in with your fingers or with the towel from before.
To be honest, this break in technique won’t be very effective by itself. I’d suggest using your oil or conditioner along with the glove wrap technique from above—or any other technique, really. Applying glove oil or conditioner is a good compliment to them all. And don’t neglect this glove love after it’s broken in, either. Giving your glove an oiled massage once every few weeks or months will extend its life and help keep it healthy. Your glove will thank you for it.
SidelineSwap's Glove Care category has lots of oils and conditioners
Playing Catch
The simplest—and most effective—way to break in your new glove is by playing good old fashioned catch with it. I’ll assume that I don’t need to give you a how-to for doing that. What I will say, though, is that you must be patient with your new leather. The first few hundred throws will be frustrating, and it will feel like you’re trying to catch baseballs with a frying pan. With each (attempted) catch, though, your glove is gradually breaking itself in, and after a few weeks of consistent catch, you’ll notice a big difference. And while you’re doing so, your glove will be molding and shaping to your hand, which is pretty cool. Plus, catch play can be combined with every other break in technique from above. So go play some catch!
Don’ts:
There are a few things to avoid when breaking in your glove. I’m going to list three that I can think of, and discuss why to avoid them.
-
Don’t put your glove in the microwave or oven. The dry heat is really bad for the leather. Let’s save those appliances for food.
-
Don’t leave your glove in the sun for long periods of time. Again: heat is bad for your glove. Direct sunlight is heat, and will even make your glove get sunburnt. And once your light-colored glove gets a tan, there’s no going back to the way it was.
-
Don’t use chapstick, cooking oil, petroleum jelly, shaving cream, or any other substance that isn’t specifically for breaking in/conditioning your glove to break in/condition your glove. Not only can these damage your glove, but leather is porous; meaning that scents and smells will absorb into your glove, even after you’ve cleaned it. An olive oil-scented glove might sound nice in theory, but it will get old quick. Stick to the professional stuff.
I’d be remiss if I didn’t mention mattresses. Sticking gloves under mattresses has long been a staple for baseball players. I, for one, did it with most of my gloves. Some sources will tell you that the mattresses’ weight on top of your glove is terrible for it, that it will flatten your glove like a pancake, and that the mattress technique should be exiled and never spoken of again—but I’m not some sources. While I do agree that the excess weight is probably unnecessary (glove wrapping will accomplish the same thing that a mattress would, but without the added pressure), shoving your glove under your mattress for a night or two isn’t going to ruin it. In fact, I believe there’s something endearing about feeling that glove lump beneath you while you sleep. So while the mattress method isn’t something I’d recommend, it isn’t a ‘don’t’, either. It’s kind of a rite of passage, so maybe do it for one night only, just to say you did so.
Form the Pocket
Lastly, I’ll discuss forming your glove’s pocket. The best way to do so is by playing catch. But while you’re doing so, focus on the ball hitting your glove’s pocket every time. Not only will this form and deepen your pocket, but it will help you catch baseballs better. And we all want to be better at catching baseballs.
If you have no catch partner, throw a baseball into your glove’s pocket as hard as you can, for as many times as possible. It will help.
If you’re going to use glove wrapping (which I’d recommend), putting a softball inside the pocket will work wonders for forming it.
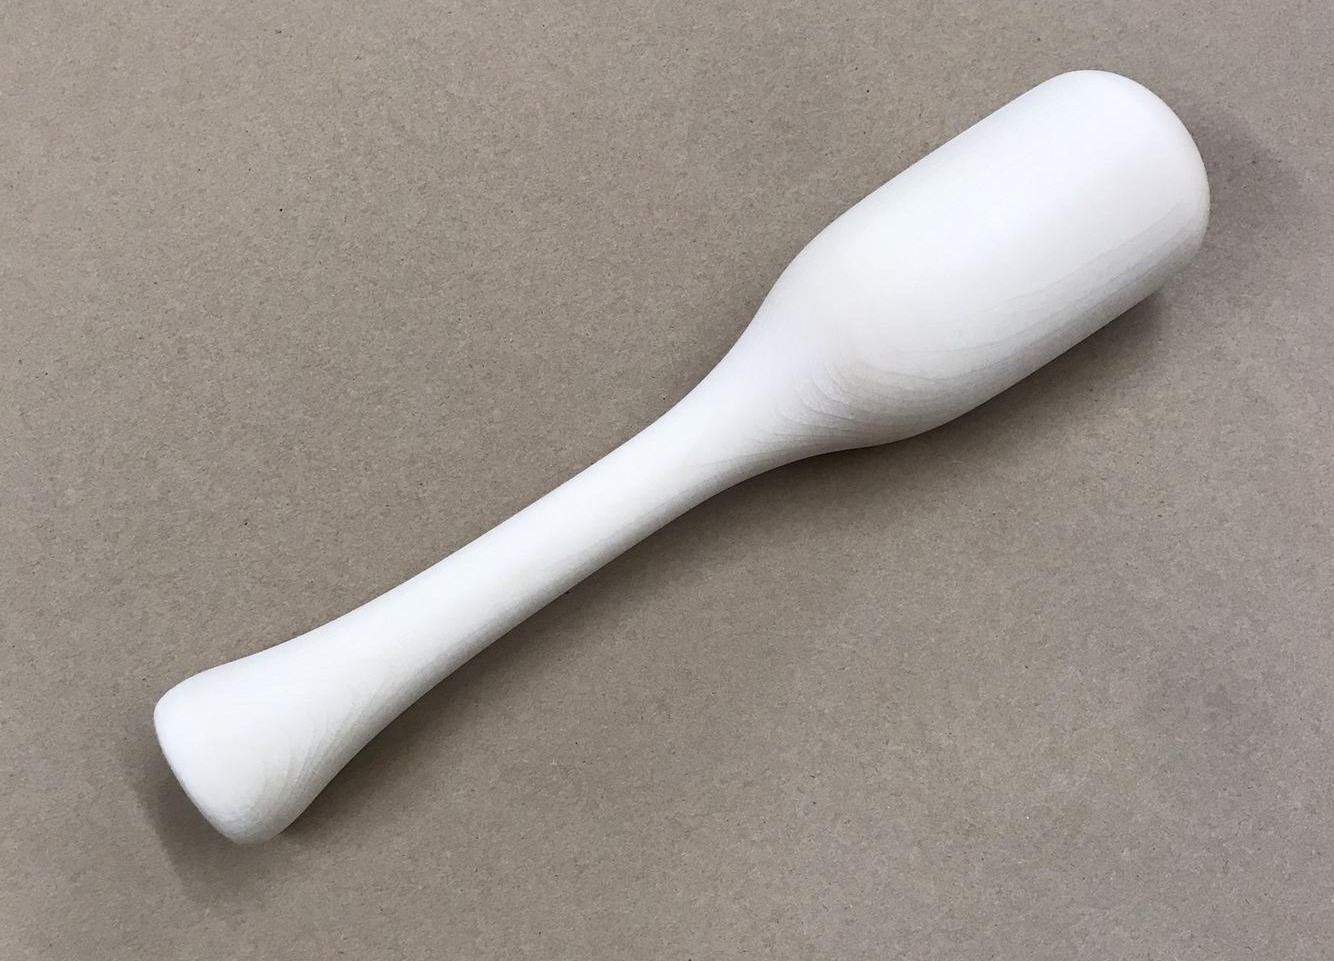
And finally, investing in a glove hammer/mallet might be worth your while. This will accomplish the same thing as throwing a baseball into your own pocket, but you’ll expend less energy and look like a professional.
A glove mallet on SidelineSwap
Conclusion
I’ll leave you with this: be as patient as possible throughout the breaking in process. If it’s taking a long time to break your glove in, that doesn’t mean you’re doing it wrong—in fact, it means the opposite. Don’t rush it (unless you play tomorrow, then perhaps get the steamer out), and enjoy the process. You’ll only get to do this so many times. And because you’ve made it this far, here’s my final recommendation: combine using glove wrapping, glove oils, and playing catch to break in your glove. You won’t regret it.
Remember, gloves are an investment. Take good care of yours and it will take care of you, too.


